
Streamline Process for Flagging Emails as Tasks in Microsoft Outlook
I currently use Microsoft Outlook to manage tasks. One thing I have been wanting to simplify is the process for flagging and categorizing email messages so they appear under Tasks. While the solution discussed in this post doesn't exactly meet my needs, it does simplify the process for many cases.
Background
A while back, I created a series of posts, starting with "Manage Tasks in Outlook: Categorizing Tasks," which walks you through how I manage tasks. The piece of the process I have been wanting is a more convenient way to flag and categorize emails that are found in folders like Sent Mail. The methods discussed in previous posts are a little on the tedious side.
Note: this article is based on Microsoft Outlook 2016 for Windows 10. I should also mention that I have made a number of customizations to simplify my workflow. So the screenshots below may differ in what you see in Outlook.
Old Method
Let's say I emailed a co-worker named Barry with a document to post online. To flag the message as a task for Barry, I would
- Right click the email
- Hover the mouse cursor over "Follow Up" and click No Date (see Figure 1)
- Right click the email again
- Hover over "Categorize" and choose Barry (see Figure 2)
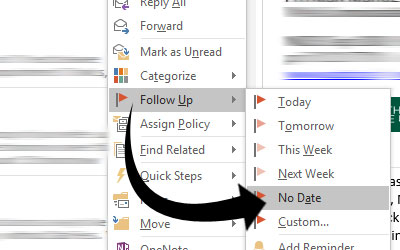
Figure 1. Choose "No Date" Flag
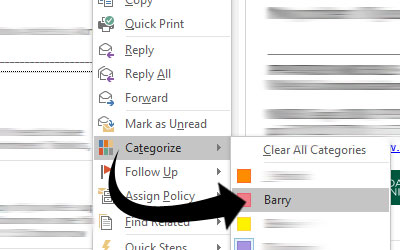
Figure 2. Choose "Barry" Category
That may not be a lot of steps, but it can be fairly tedious when I regularly delegate tasks to Barry and other co-workers. It would be much simpler to click a single button.
Create Quick Step
To turn this method into a one-click process, I now use the Quick Steps feature in Outlook. On the Home tab, under Quick Steps, click Create New (see Figure 3).
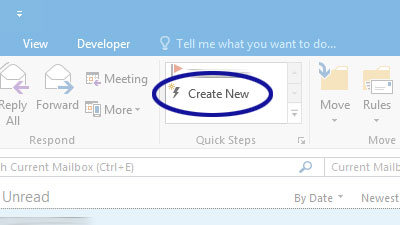
Figure 3. Create Quick Step
In the Create Quick Step dialog box
- Name the process "Task Barry"
- Under the "Choose an Action" drop down, click Flag Message (see Figure 4)
- Under the "Choose flag" drop down, click No Date (see Figure 5)
- Click Add Action
- Under "Choose an Action," click Categorize message (see Figure 6)
- Under "Choose category," click Barry (see Figure 7)
- Click Finish
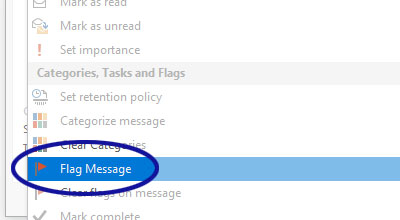
Figure 4. Choose the Flag Action

Figure 5. Set Flag
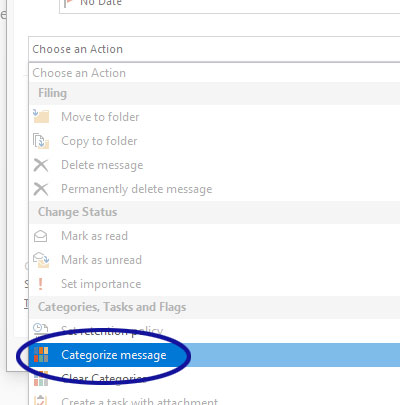
Figure 6. Choose the Categorize Action
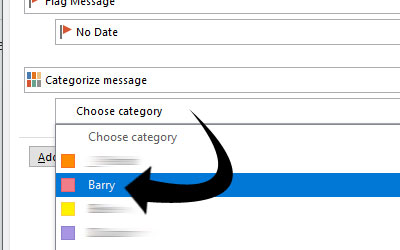
Figure 7. Set Category
New Method
Whenever I want to flag a message as a task for Barry now, I just click "Task Barry" under Quick Steps (see Figure 8).
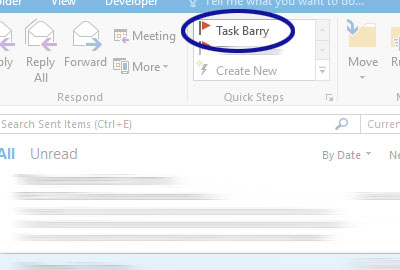
Figure 8. Flag and Categorize Email
Final Thoughts
One downfall of the Quick Steps solution is that it doesn't work for messages as you are composing them. So I'll need to stick with the method described in "Manage Tasks in Outlook: Flag Emails as Tasks Before They Get Lost in the Sent Mail Folder."
Related Posts
- Store Task Emails in Microsoft Outlook Data Files
- Manage Tasks in Outlook: Flag Emails as Tasks Before They Get Lost in the Sent Mail Folder
- Manage Tasks in Outlook: Leveraging Task Descriptions
- Manage Tasks in Outlook: Create Customizable Tasks
- Manage Tasks in Outlook: Flagging Emails as Tasks
- Manage Tasks in Outlook: Categorizing Tasks
0 Comments
There are currently no comments.
Leave a Comment