Manage Tasks in Outlook: Categorizing Tasks
When I originally looked for a way to manage tasks, I tried Microsoft Outlook's built-in feature. The problem was that there didn't appear to be a way to assign tasks to other people. Well, that turns out not to be the case. Let's take a quick look at how I currently organize tasks.
Background
It should be mentioned that I'm not technically looking to assign tasks to people; I just want to group them for easy reference. That way I can quickly review someone's tasks prior to meeting with them, for example. It's also easy to see which tasks I'm responsible for and which ones belong to someone else.
Note: the following directions are based Microsoft Outlook 2010 for Windows 7.
Task List Quick View
Since most of my time spent in Outlook involves managing email, I utilize the feature that lists tasks in a column next to the inbox. This makes the tasks easily accessible and less likely to be forgotten because they're not buried under a separate tab. To show tasks on the same screen as your emails, you can
- Click View (see Figure 1)
- Click the "To-Do Bar" option and make sure Normal is checked (see Figure 2)
- Task List also needs to be checked under the "To-Do Bar" option (see Figure 3)
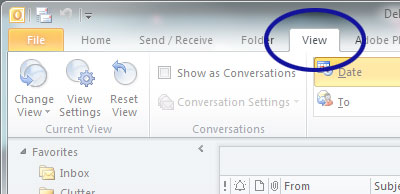
Figure 1. View Tab
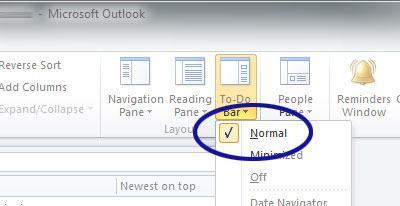
Figure 2. Selecting Normal
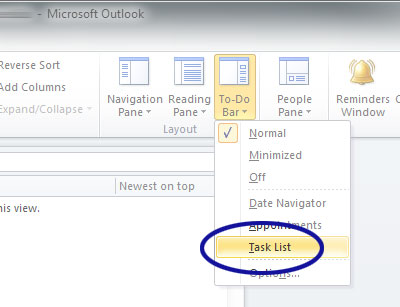
Figure 3. Selecting Task List
Creating Categories
To "assign" a task to someone, I currently use Outlook categories. To create a category,
- Right click the Categories column for any email message and click All Categories… (see Figure 4)
- Note: you may only see an empty box for the Categories column (see Figure 5)
- In the Color Categories window, click New… (see Figure 6)
- Enter the category name, color, and click OK
- When you are done adding categories, click Cancel for the Color Categories window
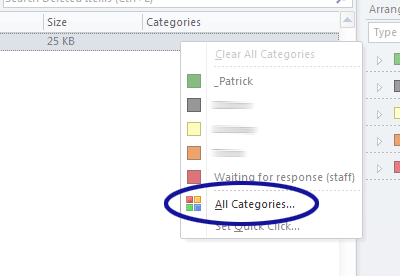
Figure 4. Click All Categories…
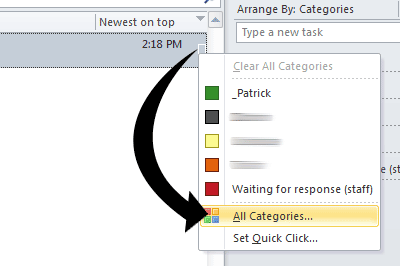
Figure 5. Empty Box for Categories Column
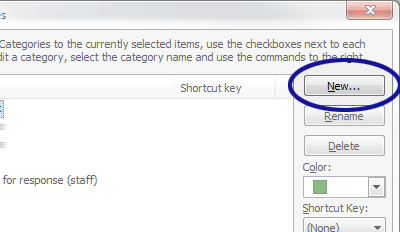
Figure 6. Adding New Category
Sorting Categories
All these categories won't be of much use if Outlook is just going to sort the task by highest priority. To sort and group the tasks by category, click the "Arrange By" option above the "Type a new task" form field and choose Categories (see Figure 7).
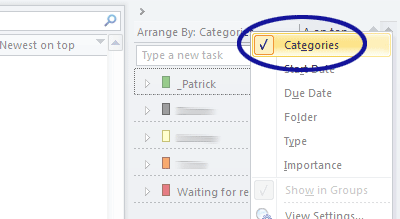
Figure 7. Sorting by Category
Final Thoughts
My categories are currently named after the people I work with regularly. I also have a category for myself called "_Patrick". The underscore before my name makes sure that the tasks assigned to me appear at the top of the Task List column. The last category that I have is called "Waiting for response (staff)". This is where I put the tasks that don't belong in the other categories.
Related Posts
- Store Task Emails in Microsoft Outlook Data Files
- Streamline Process for Flagging Emails as Tasks in Microsoft Outlook
- Manage Tasks in Outlook: Flag Emails as Tasks Before They Get Lost in the Sent Mail Folder
- Manage Tasks in Outlook: Leveraging Task Descriptions
- Manage Tasks in Outlook: Create Customizable Tasks
- Manage Tasks in Outlook: Flagging Emails as Tasks


0 Comments
There are currently no comments.
Leave a Comment