
Manage Tasks in Outlook: Flag Emails as Tasks Before They Get Lost in the Sent Mail Folder
Part of managing my task list involves monitoring the email requests I send to co-workers. Since I can't remember the details of every request, I flag the messages in Microsoft Outlook so they appear in my task list. The problem is that I don't always remember to go to my Sent Mail folder and flag the requests. And some of them end up being lost. So I am getting into the habit of flagging emails as they are being written.
Background
In a previous post (Manage Tasks in Outlook: Flagging Emails as Tasks), I described my usual process of going to the sent mail folder and dragging messages to my task list. This creates a task under one of my task categories based on where I drop the email message. The problem with this process is that it's easy to forget to drag the messages over, especially when I am focused on a project.
Note: the screenshots and directions below are based on Microsoft Outlook 2010 for Windows 7.
Alternate Solution
Instead of waiting until they are already sent, messages can be flagged as they are being written. In the Compose Message window
- Click Follow Up under the Message tab / ribbon
- Click No Date (see Figure 1)
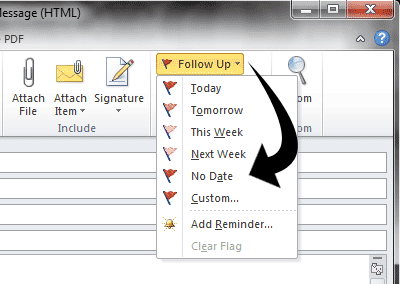
Figure 1. Select the No Date option
This adds your message to the task list once it is sent. However, if you categorize tasks like I do, there is an extra step.
- In the Tags group, click the little icon for more options (see Figure 2)
- Click Categories (see Figure 3)
- Choose a category (see Figure 4) and click Close
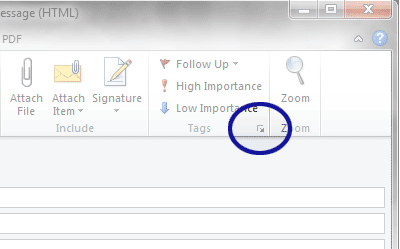
Figure 2. View More Options in the Tags Group
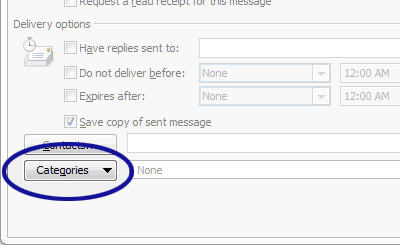
Figure 3. Click Categories
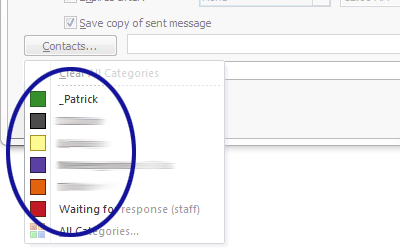
Figure 4. Choose a Category
Quick Access Options
Unfortunately there doesn't seem to be a way to add the category selection process to the Quick Access Toolbar in Outlook; at least not for Outlook 2010. But you can incorporate the No Date option.
- Click the down arrow next to the Quick Access Toolbar and click More Commands… (see Figure 5)
- Under the Choose commands from drop down, select Message Tab (see Figure 6)
- Locate and click No Date (see Figure 7)
- Click Add > > (see Figure 8)
- Click OK
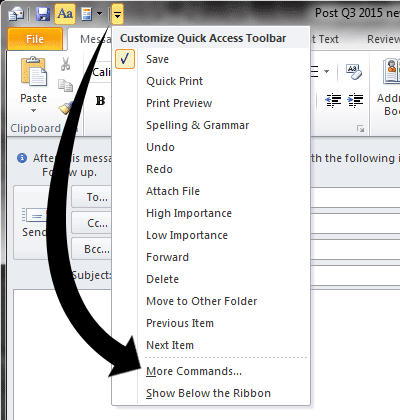
Figure 5. Add More Commands to the Quick Access Toolbar
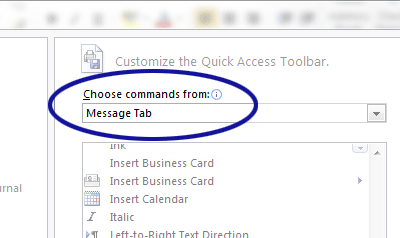
Figure 6. Choose the Message Tab
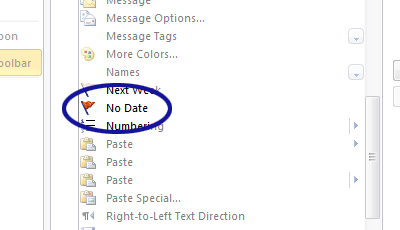
Figure 7. Select the No Date Option
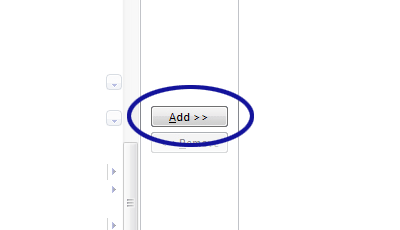
Figure 8. Click the Add Button
Related Posts
- Store Task Emails in Microsoft Outlook Data Files
- Streamline Process for Flagging Emails as Tasks in Microsoft Outlook
- Manage Tasks in Outlook: Leveraging Task Descriptions
- Manage Tasks in Outlook: Create Customizable Tasks
- Manage Tasks in Outlook: Flagging Emails as Tasks
- Manage Tasks in Outlook: Categorizing Tasks
0 Comments
There are currently no comments.
Leave a Comment