Making it Easy for Visitors to Share Your Content with AddThis.com
With how common social networking tools like Facebook and Twitter are becoming, I wanted to make it easier for website visitors to share our (the organization I work for) content with their colleagues. Instead of developing my own solution, I decided to utilize AddThis.com, which provides a customizable widget that can be embedded within a website. According to their website, the widget currently allows visitors to share content with more than 300 services around the world.
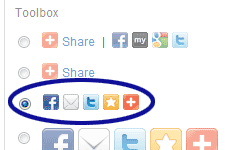
For our website, we chose the standard "Website" option and the small sharing buttons shown in Figure 1.

Figure 1. AddThis.com Button Type
Default Code
The default code provided by AddThis.com dynamically lists the share buttons based on how your visitors use them. For example, if most of your users share content on Twitter then "addthis_button_preferred_1" in the code below will show the Twitter button:
<!-- AddThis Button BEGIN -->

<div class="addthis_toolbox addthis_default_style">

<a class="addthis_button_preferred_1"></a>

<a class="addthis_button_preferred_2"></a>

<a class="addthis_button_preferred_3"></a>

<a class="addthis_button_preferred_4"></a>

<a class="addthis_button_compact"></a>

</div>

<script type="text/javascript" src="http://s7.addthis.com/js/250/addthis_widget.js#username=YourUsernameHere"></script>

<!-- AddThis Button END -->
Note that "YourUsernameHere" needs to be replaced with your username provided by AddThis.com.
Choosing the Buttons
Instead of using the default code, we always want to show the Facebook, LinkedIn, Twitter, and email buttons. So we changed the "addthis_button_preferred_1", "addthis_button_preferred_2", etc. to:
<!-- AddThis Button BEGIN -->

<div class="addthis_toolbox addthis_default_style">

<a class="addthis_button_facebook"></a>

<a class="addthis_button_linkedin"></a>

<a class="addthis_button_twitter"></a>

<a class="addthis_button_email"></a>

<a class="addthis_button_compact"></a>

</div>
Note that we kept the orange plus-sign button. That way visitors have the option to share with their preferred social networking tool.
Adding a Label
To make the purpose of the buttons more obvious, we wanted to add a label to the left of the buttons. Well, if you just add the label before the first button, the label magically moves to the right of all the buttons when viewed on the Web. To keep the label to the left, you'll need to surround it with an HTML tag like "<span>" and add the "addthis_separator" class:
<!-- AddThis Button BEGIN -->

<div class="addthis_toolbox addthis_default_style">

<span class="addthis_separator">Share: </span>

<a class="addthis_button_facebook"></a>

<a class="addthis_button_linkedin"></a>
Right Align the Widget
Before embedding the AddThis.com widget into our website we needed to make one last modification. Due to the location of the widget, we wanted to float it to the right:
<!-- AddThis Button BEGIN -->

<div class="addthis_toolbox addthis_default_style" style="float:right;">

<span class="addthis_separator">Share: </span>
What if JavaScript is Disabled?
Since the AddThis.com widget doesn't work without JavaScript, you may want to add some extra code to hide any trace of the widget when someone visits your website with JavaScript disabled. This extra code is added using the <noscript> tag.
<script type="text/javascript" src="http://s7.addthis.com/js/250/addthis_widget.js#username=YourUsernameHere"></script>

<noscript>

<style type="text/css">

/* sharing widget doesn't work without JavaScript, so we don't need to display it if JavaScript is disabled */

.addthis_toolbox { display:none; }

</style>

</noscript>

<!-- AddThis Button END -->
Final Modified Code
Once you're satisfied with the setup of your widget, you'll need to embed it into your website. I would recommend incorporating the code so it's easy to modify or remove. That way if Twitter becomes less relevant or if AddThis.com goes out of business for example, it should be simple to update the code as necessary or remove it altogether.
For reference, here is the entire modified AddThis.com code:
<!-- AddThis Button BEGIN -->

<div class="addthis_toolbox addthis_default_style" style="float:right;">

<span class="addthis_separator">Share: </span>

<a class="addthis_button_facebook"></a>

<a class="addthis_button_linkedin"></a>

<a class="addthis_button_twitter"></a>

<a class="addthis_button_email"></a>

<a class="addthis_button_compact"></a>

</div>

<script type="text/javascript" src="http://s7.addthis.com/js/250/addthis_widget.js#username=YourUsernameHere"></script>

<noscript>

<style type="text/css">

/* sharing widget doesn't work without JavaScript, so we don't need to display it if JavaScript is disabled */

.addthis_toolbox { display:none; }

</style>

</noscript>

<!-- AddThis Button END -->
Related Resources
- AddThis.com – where you can sign up for your own account and get the sharing widget.


0 Comments
There are currently no comments.
Leave a Comment